How to Clean a Vacuum Cleaner - A Comprehensive Guide
27 Feb 24
Vacuum cleaners serve as essential tools for keeping your house healthy and spotless. They assist us in removing dirt, dust, and debris from our floors and carpets, making our homes more comfortable and sanitary. However, to keep your vacuum cleaner running smoothly, it must be cleaned on a regular basis. We'll walk you through the step-by-step process of cleaning a vacuum cleaner to ensure it stays in good condition and continues to give excellent cleaning results.
1. Gather all your supplies
Gather the following supplies before beginning the cleaning process:
- A screwdriver (often a Phillips head) - A brush or broom
- A clean cloth or microfiber towel - Mild dish soap
- A bucket filled with warm water
- Replacement filters (if necessary)
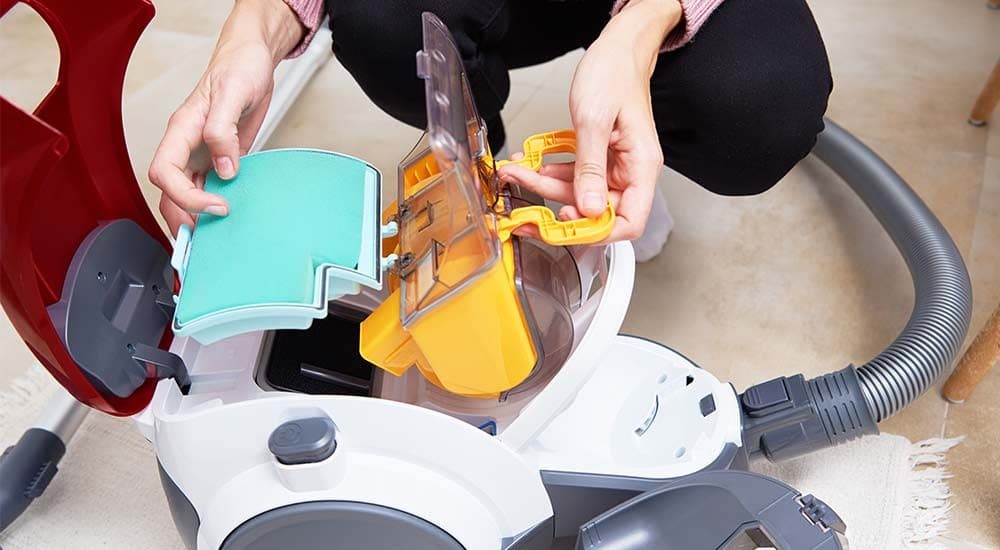
2. Unplug and Disassemble the Vacuum Cleaner
First and foremost, safety! Before doing any cleaning or maintenance operations, always unplug your Hoover cleaner from the electrical socket. Once it's safely disconnected, disassemble your vacuum cleaner as follows:
a.Take out the dustbin or vacuum bag: Open the vacuum cleaner and take out the dustbin or vacuum bag containing the dirt and debris. Replace the bag in your vacuum cleaner if it is full or damaged.
b.Remove the filters: Depending on the model of your vacuum, you may have one or more filters. HEPA filters, foam filters, and pre-filters are examples of common filter types. Remove them from the hoover with care.
c.Remove the brush roll: The brush roll on most upright vacuum cleaners is placed at the bottom. Remove any screws holding the brush roll in place using a screwdriver.
d.Remove the hose and attachments: If your hoover has detachable hoses and attachments, remove these before cleaning thoroughly.
3. Empty the Garbage Can or Bag
a. For Vacuum Cleaners Without Bags:
- Transfer the contents of the dustbin to a garbage bag or container.
- Remove any trapped material or dirt from the trash using a brush or small broom.
- Rinse the trashcan completely with warm, soapy water. Allow for complete drying before reassembling.
b. Bagless Vacuum Cleaners:
- Toss the old bag in the garbage.
- If your vacuum cleaner has a reusable cloth bag, clean it according to the manufacturer's instructions.
4. Clean the Filters
Filters are critical for catching tiny particles and allergens, therefore keeping them clean is critical for preserving the performance of your vacuum. Here's how to clean several kinds of filters:
a. HEPA Filters:
- Tap the HEPA filter gently to remove loose dirt and debris.
- Rinse the HEPA filter with running water without using soap.
- Allow the filter to completely dry before replacing it. This could take several hours or even overnight.
b. Foam Filters and Pre-filters: Clean these filters with warm, soapy water.
- Thoroughly rinse until the water flows clean.
- Let the filters air dry before replacing them in the vacuum cleaner.
c. Carbon Filters (if applicable):
- Replace carbon filters as directed by the manufacturer, as they cannot be cleaned.
5. Disinfect the Brush Roll and Nozzle
a. Carefully cut away any hair or string wrapped around the brush roll using scissors or a seam ripper.
b. Inspect the nozzle or brush head for any obstructions. To clean any debris from the nozzle, use a long, flexible brush or a straightened coat hanger.
c. Replace the brush roll and secure it with the screws you removed previously.
6. Thoroughly clean the hose and any attachments.
a. Dislodge any stuck dirt or debris by running a brush or broom handle through the hose.
b. Wipe down the attachments and clean any gaps with a cloth or towel.
7. Reassemble the Vacuum Cleaner
When all of the vacuum cleaner's components are clean and dry, it's time to reassemble it. Take the following steps:
a. Replace the clean filters in their original slots.
b. Replace any removable attachments and the hose.
c. Replace the dustbin or bag, making sure it's properly fastened.
d. Reconnect your vacuum cleaner cleaner to the power outlet.
8. Put Your Vacuum Cleaner to the Test
Perform a quick test to ensure that everything is working properly before resuming regular use of your Hoover cleaner. Turn it on and hoover a small area to confirm that it is collecting dirt as it should.
9. Maintenance Recommendations
Here are some more maintenance suggestions to keep your hoover functioning smoothly and efficiently:
a. Inspect and clean filters regularly, preferably after every few uses or if you notice a drop in suction power.
b. To maintain ideal airflow, empty the trash can or replace the bag when it is about two-thirds full.
c. Check the brush roll and nozzle for clogs on a regular basis.
d. Keep your vacuum in a dry, cool place to avoid mold and mildew growth.
Cleaning your vacuum cleaner may appear to be a time-consuming operation, but it is critical for preserving its effectiveness and extending its lifespan. Regular cleaning ensures that your vacuum cleaner can properly remove dirt and allergens from your home, allowing you to keep your living area cleaner and healthier. By following the procedures indicated in this detailed guide and implementing regular maintenance into your cleaning routine, you may improve the quality of your cleaning.
More Resources:
How to Clean Your Robotic Vacuum
