How to Clean Your Robotic Vacuum
16 Apr 24
Robotic vacuums have transformed the way we clean our homes. These useful machines tirelessly cruise our living environments, collecting dust, filth, and debris. However, constant maintenance and cleaning are required for them to perform smoothly and effectively. We'll lead you through the step-by-step process of cleaning your robotic hoover to ensure it stays in good working order and continues to give you pristine floors.
1. Gather Your Cleaning Materials
Gather the following supplies before beginning the cleaning process:
- A squeaky-clean cloth or a microfiber towel
- A little brush or cleaning tool (which is frequently included with your robotic vacuum)
- A screwdriver (if disassembly is required)
- Gentle dish soap
- A bucket filled with warm water
2. Power Down and Unplug
When cleaning any electronic gadget, safety comes first. What you should do is as follows:
a. Turn Off: Make sure your robotic vacuum is turned off or in "OFF" mode, and remove it from its charging station if applicable.
b. Unplug: Unplug the charging base from the socket and the vacuum if it has a detachable charging cord.
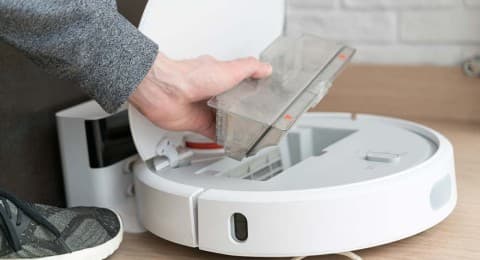
3. Remove the Wastebasket or Container
Most robotic vacuums include a dustbin or container for collecting trash. To clean it, follow these steps:
a. Remove the dustbin's lid or access panel.
b. Remove the dustbin with care, being careful not to spill its contents.
c. Empty the trash can into a garbage bag or container.
4. Clean the Dustbin or Container
Dust and debris can gather in the dustbin or container over time. To effectively clean it:
1. Dislodge any sticky dirt or debris inside the trashcan with a brush or a tiny cleaning instrument.
2. Rinse the garbage can with warm, soapy water. After properly cleaning it, rinse it with clean water until no soap residue remains.
3. Allow the trashcan to fully dry before reassembling it. To prevent mold formation, make sure it's completely dry.
5. Remove and clean the filter(s).
Filters are frequently used in robotic vacuums to catch tiny particles and allergies. Here's how to clean several kinds of filters:
1. HEPA Filters: Gently tap the HEPA filter to remove any loose debris or dust.
- Rinse the HEPA filter with running water, but do not use soap.
- Allow the filter to completely dry before replacing it. This could take several hours or even overnight.
2. Foam Filters and Pre-filters: Clean these filters with warm, soapy water.
- Thoroughly rinse until the water flows clean.
- Let the filters air dry before replacing them in the hoover.
3. Carbon Filters (if applicable): Replace carbon filters as directed by the manufacturer, as they are not washable.
6. Clean the Brushes and Wheels
Brushes and wheels of robotic vacuums must be cleaned regularly. Take the following steps:
1. Brush Roll: Remove the brush roll by following the manufacturer's instructions (this may require the removal of screws or clips).
- Carefully cut away any hair or string wrapped around the brush roll with scissors or a seam ripper.
- Use a moist cloth to remove any leftover dirt or debris from the brush roll.
- Replace the brush roll as directed by the manufacturer.
2. Side Brushes: If applicable, remove any side brushes.
- Use a brush or towel to clean dirt and hair from them.
- Firmly reattach the side brushes.
3. Wheels: Look for any trash or hair wrapped around the wheels.
- Thoroughly clean the wheels using a brush or cloth.
7. Inspect the Sensors and Sensors' Path
Sensors are used by robotic vacuums to navigate around your home. To ensure optimal performance, clean the sensors and the sensors' path:
1. Using a clean cloth, gently wipe the sensors to remove any dust or smudges.
2. Examine the sensors' path for any obstructions or dirt, and clear it as needed.
8. Reassemble and charge
After cleaning and drying all components, it's time to reassemble your robotic vacuum:
1. Replace the cleaned filter(s) in their original slots.
2. Carefully reattach the dustbin or container, making sure it's secure.
3. Return the robotic vacuum to its charging dock and, if necessary, plug in the charging cord.
9. Test Your Robotic Vacuum
Perform a brief test to ensure your hoover is working properly before returning it to regular usage. Allow it to fully charge before running a cleaning cycle to check it is gathering up dirt as expected.
10. Maintenance Recommendations
Here are some more maintenance ideas to keep your robotic vacuum functioning smoothly and efficiently:
a. Empty the trash can or container after each cleaning cycle or when it becomes full.
b. Clean the filters and brushes regularly, ideally after every few uses or when you observe a decrease in cleaning performance.
c. Check for and install software upgrades as recommended by the manufacturer to improve operation.
d. Keep the charging port area clean and clear of obstacles so that your robotic vacuum may dock and charge properly.
e. When not in use, keep your robotic vacuum in a cool, dry place to prevent dust and debris from settling on it.
Cleaning your robotic vacuum is an important aspect of keeping it efficient and keeping your floors spotless. Cleaning and maintaining your equipment regularly not only extends its life but also contributes to a cleaner and healthier home environment. You may enjoy the comfort of a well-maintained robotic vacuum for years to come if you follow the procedures suggested in this detailed guide and incorporate periodic maintenance into your cleaning regimen.
